


How to Install Elasticsearch in Ubuntu for Enhanced Search Capabilities
Elasticsearch is a powerful open-source search and analytics engine that offers efficient searching, indexing, and data analysis. By installing Elasticsearch on your Ubuntu system, you can enhance search functionalities and improve data management. In this tutorial, we’ll walk you through the step-by-step process of installing Elasticsearch in Ubuntu, ensuring a smooth and optimized installation.
Step 1: Update Your Ubuntu System
Update your Ubuntu system to ensure you have the most recent packages and security updates before continuing with the installation. Then, enter the following commands into the terminal:
sudo apt update
sudo apt upgrade
Step 2: Install Java Development Kit (JDK)
Elasticsearch requires Java Development Kit (JDK) to run. Let’s install JDK using the following commands:
sudo apt install default-jdkAfter the installation is complete, verify the Java installation by running:
java -versionStep 3: Download and Install Elasticsearch
To install Elasticsearch, you will need to download the Debian package provided by Elasticsearch. Execute the following commands to import the Elasticsearch GPG key and add the Elasticsearch repository:
wget -qO - https://artifacts.elastic.co/GPG-KEY-elasticsearch | sudo apt-key add -
sudo apt-get install apt-transport-https
echo "deb https://artifacts.elastic.co/packages/7.x/apt stable main" | sudo tee /etc/apt/sources.list.d/elastic-7.x.list
Update the package lists and install Elasticsearch:
sudo apt update
sudo apt install elasticsearch
Step 4: Configure Elasticsearch
Elasticsearch configuration files are located in the /etc/elasticsearch directory. Open the main configuration file using a text editor:
sudo nano /etc/elasticsearch/elasticsearch.ymlInside the configuration file, you can modify various settings according to your requirements. For example, you can adjust the amount of memory Elasticsearch uses by modifying the Xms and Xmx values. It is recommended to allocate no more than half of your system’s memory to Elasticsearch.
Once you have made the necessary changes, save the file and exit the text editor.
Step 5: Start and Enable Elasticsearch
To start Elasticsearch, execute the following command:
sudo systemctl start elasticsearchTo ensure that Elasticsearch starts automatically on system boot, enable the service:
sudo systemctl enable elasticsearchStep 6: Verify Elasticsearch Installation
To verify the installation and check the status of Elasticsearch, run the following command:
sudo systemctl status elasticsearchIf Elasticsearch is running correctly, you should see a message indicating its status as “active (running).”
Step 7: Test Elasticsearch Functionality
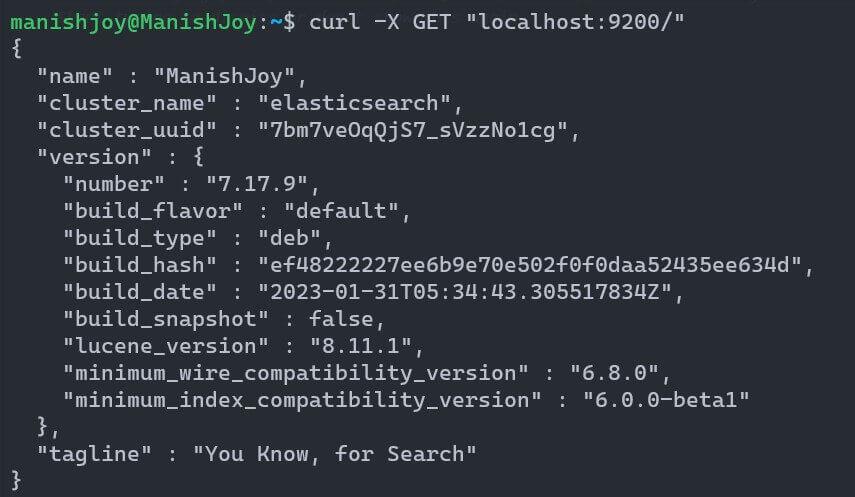
To test Elasticsearch, you can use the curl command-line tool to interact with the Elasticsearch REST API. Run the following command:
curl -X GET "localhost:9200/"If everything is set up correctly, you will receive a response containing information about your Elasticsearch cluster, such as the version number and cluster name like this:
Conclusion
Congratulations! You have successfully installed Elasticsearch on your Ubuntu system, unlocking its powerful search capabilities. By following this step-by-step guide, you have learned how to set up Elasticsearch, configure its settings, and verify its functionality. With Elasticsearch up and running, you can now integrate it into your applications or use it to enhance search functionality within your system.
Reference: elastic.co
About Author

Liked the post, share with others: